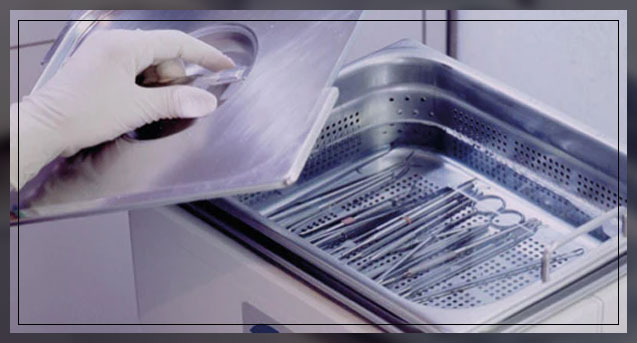
Cleanliness, as you know, is one word that dominates almost every medical professional. Everything in a dentist’s clinic should be cleaned on a patient-by-patient basis. The staff should wipe down, change paper, and, most importantly, sterilize instruments. The risk of spreading infection during oral medical procedures is naturally very high. Do you know how delicate tissues in the mouth can be? Therefore, it is the reason why ultrasonic cleaners are so popular in the medical field.

Unlike the ultrasound cleaner, no other cleaning method can clean quickly or thoroughly, especially in large batches.
How Does an Ultrasonic Cleaner Work?
Ultrasonic baths generally take advantage of a phenomenon known as cavitation. High-frequency sound waves are used in this process to create microscopic vacuum bubbles. The vacuum bubbles are forced against the object being disinfected. As the bubbles collapse, it forces the surrounding cleaning solution to fire into the space the bubble once occupied.
It creates a powerful “scrubbing” action that will get into even the tiniest spaces. As you can imagine, cleaning dental instruments is a considerable advantage using the cleaner.
Ultrasonic Cleaner for Dental Instruments
Using an ultrasonic cleaner for dental instruments is a recommended practice. All professional organizations, including the American Dental Association and the Food and Drug Administration, recommend its use. The reason being it can remove contaminants from reusable dental tools.

Therefore, dental clinics today employ ultrasonic cleaners for dental instruments before sterilization. It avoids heat “baking on” blood, tissue, and other organic residues. Note that these cause infection problems. Therefore, ultrasonic dental instrument cleaning systems are ideal for cleaning molds and implant hybrid prostheses. They are also helpful for removing plaster and cement from bridgework.
The Value of Ultrasonic Cleaner In Dental Practice
Yes, it is important to note that ultrasonic cleaners are a valued addition to instrument cleaning tools in many general dental practices. You need to find different ways to clean these tools efficiently. It is recommended that dental tools should be cleaned ultrasonically before first use.
Experts believe that dental tools should be sufficiently decontaminated by ultrasonic cleaning. Otherwise, the doctor should discard it after use. However, most dentists clean the instruments after use. Ideally, the dental appliances should be visibly clean after ultrasonic cleaning and look clean when viewed with an electron microscope.
Several studies prove that ultrasound alone is insufficient for sterilization. Further avenues of research have highlighted this point.
Choosing an Ultrasonic Cleaner and Solution
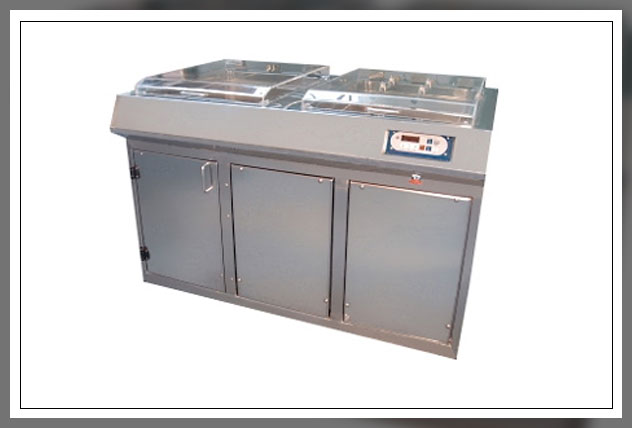
When doctors choose the cleaner – they should choose the right one for their specific facility. There are two significant factors to consider.
The first is the size of the instruments you want to clean. Secondly, how many instruments do you want to clean in one go? These are the two factors that will determine the size of tank you need, along with your cleaning cycle time.
Many cleaning units also give you the choice of heat or no heat. It may also have analog or digital controls. You can opt for a heated, digitally controlled unit. As you know, heat is essential for cleaning and disinfecting, and heat also assists in ultrasonic transmission. Digital controls have the advantage of batch-to-batch consistency and precise power and temperature control.
What kind of solution usually goes into the tank? The solution you use solely depends on whether you focus on cleaning, decontamination, or both.
If you want to clean, several ultrasonic cleaners will do the job. It is biodegradable, aluminum safe and an emulsifier – meaning that it will hold particles in suspension. This technique prevents re-deposition onto your instruments.
Cleaning and Disinfecting Dental Instruments
The actual cleaning of dental instruments and similar items in an ultrasonic washer is a fairly simple:
- The first thing on your to-do list for this process is to have a test for cleanliness. Without an objective standard for cleanliness, how can you ever say if the job is done? Since this instrument is concerned mainly with removing organic debris, this can be simple to use. You can observe under 20x magnification the cleaned tools should have no detectable soil remaining. It is a simple test to check the performance.
- You should briefly rinse the instruments. While the cleaner will remove even the most tenacious soils. Therefore, there is no reason to contaminate your cleaning solution with the rinsed off debris.
- You should fill the tank to the indicated “fill line” with clean water and disinfectant/cleaning solution. Set the temperature to 150-160 degrees Fahrenheit. Some units may have a tank with a simple on/off heating function. If you can adjust the heat. Remember that while ultrasonic cleaning will remove soils – it will do its own disinfection completely. You might need to add a disinfecting agent into the tank. Else you can also use an autoclave. Check your clinic’s requirements for cleaning the instruments.
Run to Test
- You should run the tank for five to ten minutes with the tank empty but only your solution. This will help the heater to reach the desired temperature. Moreover, it will also “de-gas” the solution. Degassing is primarily a process whereby trapped air in the cleaning solution is driven out by ultrasonic activity. This step is necessary because until this gas is cleared – some of the energy might be wasted on this instead of being used for cleaning. So you should positively carry out this step without failure. This can throw off your results. It may even give you an incorrect indication of the required cleaning time.
- Next, lower instruments, or racks of instruments, into the tank. You may need to use a basket or a support rack. You cannot use the bottom of an ultrasonic tank. The reason is – it is where the transducers are located. It is always better to use a basket as it makes the cleaning a lot easier and also makes it easier to get out of the tank. Set temperature, cleaning time, and power to desired parameters. Start with a fixed time and see where that leaves you. If you still do not meet your requirements, increase the cycle time or even the temperature. Note that after a while, little additional cleaning will take place.
- Record your results. You must always strive to develop the cleaning process that consumes the least time, heat, and also cleaning solution concentration. These smart tips will make your process more effective and economical.
- At the end of the cycle, remove the instruments from the tank. Dry with high temperature filtered compressed air if available. After air drying, they are ready to use.
Beyond Instrument Cleaning
Ultrasonic cleaners are top-rated these days for cleaning other dental-related items. Even in other medical areas apart from dentistry. Some examples of commonly cleaned dental items include:
Dentures – Many individuals have discovered the effectiveness and ease of cleaning their dentures in an ultrasonic bath. Since the ultrasonic cleaning process is so precise, all odor-causing bacteria and viruses are stripped away with each cleaning. Finally, leave your dentures clean and fresh.
Retainers – Just like dentures, retainers can become soiled and odorous in a short time. With the proper cleaning solution, your retainers can be cleaned to a like new condition.
Does ultrasonics work for dental instruments? Yes. Today there are thousands of dental offices and hospitals which use this device. Many studies have been done indicating that ultrasonic cleaning is an easy and effective method not only for removing organic contaminants but reducing viral load too.
Effectiveness of Ultrasonic Cleaning of Dental instruments
Purpose: The prime objective is to measure the blood contamination on dental instruments precisely. Tools are regularly used for routine prevention and to assess the effectiveness of ultrasonic decontamination. It is required to reduce blood and virus contamination on dental instruments.
Material and Methods: Human blood contamination present on dental instruments obtained after routine prophylaxis was analyzed. They used IgG as a blood marker. Results. The estimated contaminating blood volume normally ranges between 1.4 x 10(-6) to 2.0 x 10(-4) ml.
The instruments were contaminated with blood such that the maximum possible retained blood volume could be present. It was about 10-fold higher than the normal levels of contamination. It is important to note that the hand scrubbing of contaminated instruments was relatively ineffective and inconsistent in removing any blood contamination from the devices.
Whereas an ultrasonic cleaner was more effective than hand washing. It could result in greater than a 100-fold reduction of blood contamination. With the use of a mouse model virus (lactate dehydrogenase-elevating virus, LDV), high levels of virus contamination of dental instruments and dental handpieces could be achieved. It was done after assessing the residual virus.
Ultrasonic cleaners could reduce the level of virus contamination on dental instruments by one million-fold. In addition, the virus contamination present in dental handpieces could reduce by one thousand-fold.
The above results provided quantitative estimations of the infection threat. And how the cleaner could help reduce it by ultrasonication – posed by human-exposed dental instruments.
Conclusion
Most dental offices and clinics today use ultrasonic cleaners for dental instruments. In the process, there is an increased productivity and cleaning effectiveness. At the same time it reduces contamination and spread of infections.
You can contact our team for details and suggestions on ultrasonic cleaner systems best suited to clean your dental instruments.
Read related articles on stainless steel braces, MRI scan, hand sanitizer, hand hygiene, blood test, and more.